The Raimondi H20 RLS 1.5 mm spacers 200 pcs are used for professional installation which requires perfect flatness between the tiles.
LEVELING SPACERS
- Proper installation requires perfect flatness between the tiles.
- Often due to supports (caldanes) that are not perfectly levelled, tiles of low thickness and therefore flexible, or tiles of large format and therefore heavy, even with the utmost attention, cannot be positioned in an optimal manner.
- As a result, tiles that appeared perfectly level during installation, once the adhesive has set, instead present unevenness that compromises their aesthetics.
- All this can be avoided thanks to the use of leveling spacers, which, in addition to maintaining perfect leveling between the tiles, speed up installation.
- With the leveling spacers, installation is easy, quick and the tiles remain perfectly level.
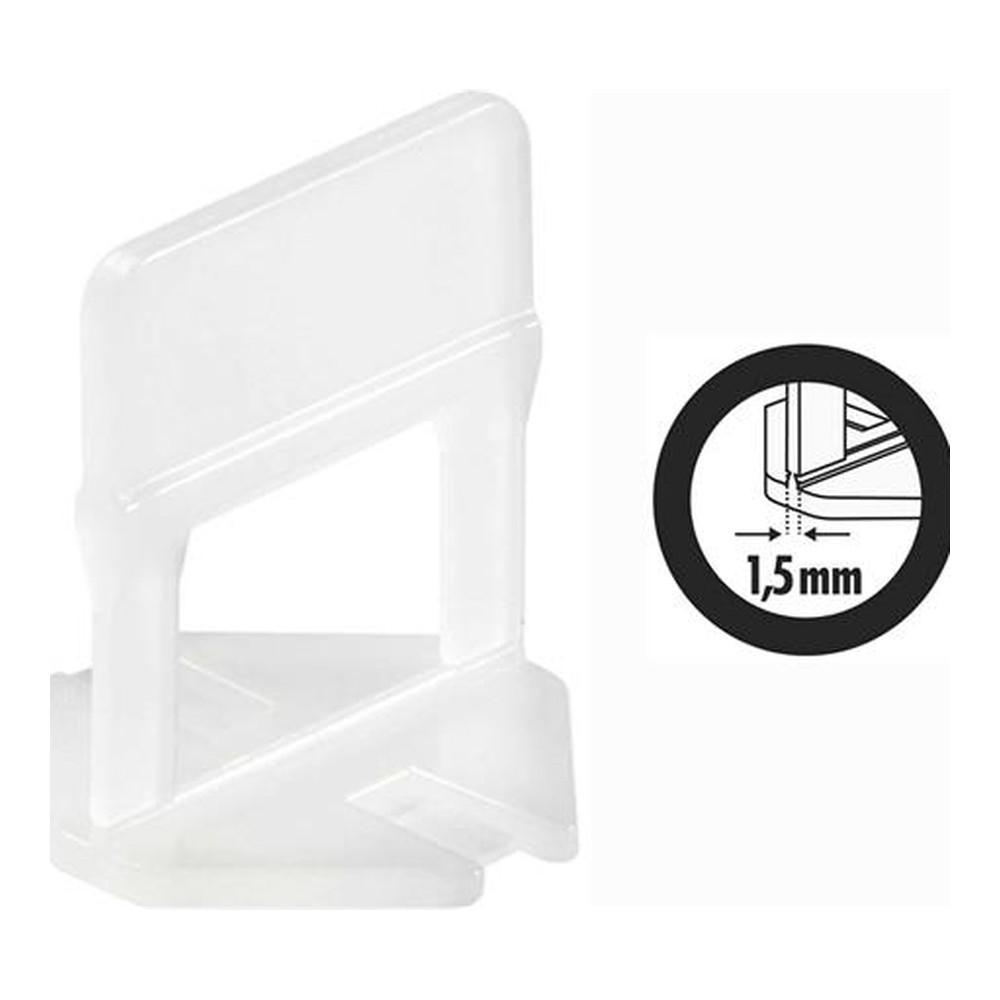
- Minimum joint/joint width: 1.5 mm.
Tile thickness: minimum 3 mm, max 20 mm.
- Both positioning of the leveling spacer and removal is quick and easy.
HOW TO USE:Positioning of the Raimondi base:1. After having spread the adhesive, insert the support underneath the tile on the 4 sides.
2. Depending on the size of the tile, position one or more supports on each side of the tile.
3. Position the tile and tap it with a rubber hammer.
Insertion of the wedge:1. Insert the wedge into the slot in the support, being careful not to go beyond the breaking point.
2. To facilitate the insertion of the wedge, we recommend the use of adjustable traction pliers.
Elimination of the support:Once the adhesive has cured, the protruding part of the support is separated from the base by striking, in the direction of the grout line, with a rubber hammer or with the foot or with adjustable traction pliers.